

House owners Lloyd and Aimee Meyers and their two little ones, Caroline and Landon, adore their property, but they are not so fond of their ’80s kitchen.
So, we’re helping this spouse and children with an inexpensive renovation — at just $1,200 in components — that will go away a big affect!
We’re bringing this ’80s-design and style kitchen into the 21st century with a special two-part episode. This posting addresses element two of the venture. (Skipped section one particular? Catch up here!)
Touching Up the Cupboards
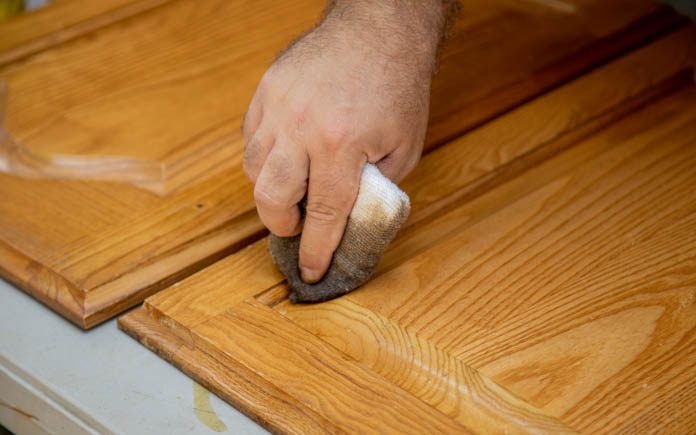
Lloyd and Aimee’s cupboards, general, are in good form. Nonetheless, they have a several unpleasant scratches.
The householders don’t want to paint these cupboards for the reason that they really like the loaded wooden grain. Rather, we’re touching up the stain and providing them a clean coat of polyurethane.
In part one of this challenge, we cleaned and prepped the cabinets. In this episode, Chelsea displays Lloyd how to appropriately implement stain, waiting a number of minutes for it to sink into the wood, just before removing it.

Just after the polyurethane has dried, we put the cabinet doors again on the containers and install new classy pulls.
It is this sort of a easy adjust — adding new hardware — but one particular issue is specific: these cabinets no longer scream 1980s!
Very best of all, Aimee loves how the refinished cupboards and new components entirely completely transform her kitchen area.
Replacing the Backsplash
Lloyd and Aimee’s kitchen area experienced just two modest backsplashes in the sort of dated ceramic tile guiding the sink and oven.
We’re changing those people with fashionable subway tiles — and this new, sweeping backsplash will go over each and every wall in the workspace. The consequence will be a steady glance that leaves a spectacular effect.
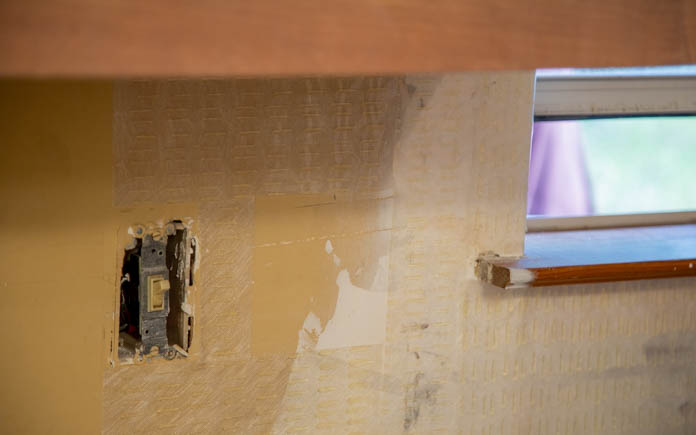
We ran into just one particular stumbling block just before setting up work on the new backsplash. We taken out the outdated backsplash and understood it taken out portions of the wall.
Points never normally go as prepared during property advancements, but in this circumstance, we just changed the drywall. Very simple adequate!
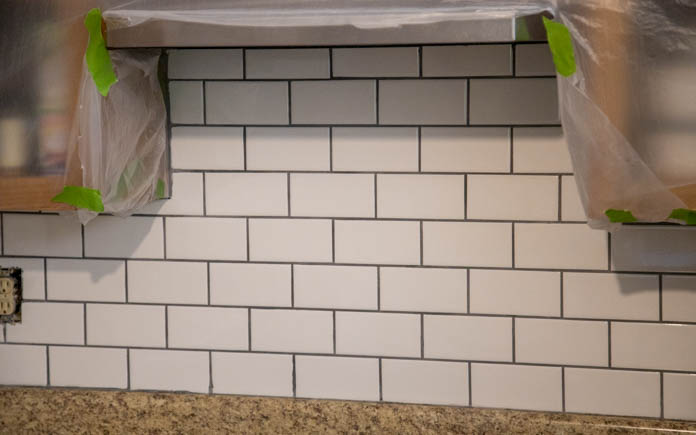
For the backsplash set up, we use SimpleMat from Custom made Setting up Products. It is generally a double-sided sticker. Initial, you use SimpleMat to the wall. Then, clear away the adhesive entrance and implement tiles to the SimpleMat. Right after that, grout the tiles and take away the extra.
You can discover extra about the process in our how-to movie.
This page incorporates affiliate inbound links. If you purchase a products from these inbound links, we will get paid a compact fee at no more expense to you.
Refinishing the Countertops
This kitchen’s counter tops are in great shape, but the plastic laminate no extended wows Lloyd and Aimee. And these countertops won’t glance superior next to the shiny white backsplash we have put in.
A single very simple decor trick is to update two adjacent surfaces with contrasting shades. The subway tiles are white, so these counter tops will be black.
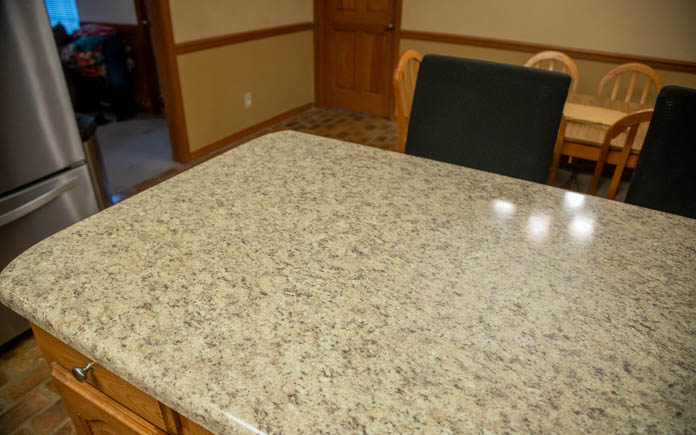
You can paint laminate counter tops, but we’re heading to do a thing added particular, resurfacing them with Daich Coatings’ SpreadStone Countertop Refinishing Package.
This item, observed in Volcanic Black, essentially mixes dark paint with serious stones for a stunning countertop makeover, and the application couldn’t be less complicated.
Initially, we sand the counter tops to sleek out the laminate and take out any grime. Then we clean up the countertop so primer will bond to it.

The moment the primer is dry, we utilize the stone coating, as directed, and allow it dry. Afterward, we sand it so the stone shines as a result of, providing the countertop a attractive granite appear.
Lastly, we end it off with sealer.

Creation Ideas
When we to start with noticed the Meyers’ kitchen area, it was trapped in the ’80s and in dire will need of a present day makeover.
By portray about mustard-colored walls, changing out-of-date light-weight fixtures and installing a new backsplash, this kitchen area is now in the 21st century!
The new wall colour is lighter and brighter. The cupboards seem new, with a fresh new coat of polyurethane and stylish pulls. And the white subway tile backsplash contrasts superbly with the dim countertops and gentle fixtures.


